
Japanese woodblock printing day with Laura Boswell
6 December 2012
Edited 23/06/2015
I had a fabulous day yesterday learning how to do Japanese woodblock printing. Laura demonstrated the technique at a BAFA talk in October and it really inspired me. (See the blog post BAFA Japanese woodblock printing talk and demo) Fellow artist and BAFA member, Cathy Read and I decided we must give it a go and thought it would be great to do the day together.
Laura’s studio at her home in Winslow, sits at the bottom of her garden and it was a fascinating treasure trove of interesting equipment, work in progress and finished framed work. I got a bit of studio envy when I saw it!
We didn't waste any time getting started. The first thing we were shown was how to use the wood cutters on a piece of practise wood. They took a little bit of getting used to. Some cutters were easier to use than others – I found the cutters that were most like my lino ones the easiest – the trickiest was the cutter that outlined the areas to cut, called a hangi-to – this had to be held in a ‘Psycho shower scene’ way (Laura’s description!) and the direction and angle of the cut was very important which was confusing initially. The wood was actually far easier to cut than I was imagining – not too much harder than my lino to cut (though it does occur to me that my lino tools might just be horrendously blunt!). Once Laura felt we had got the hang of the practise cutting we were asked to draw out our design on paper. I choose to design a festive robin with some holly and Cathy chose to do a design with the Gherkin building (which looked very confusing to me, but Cathy handled it well!).
At this early stage in the process I had no idea how to decide what areas of the print would need to be on which blocks – or what bits needed cutting, so Laura helped plan out my blocks. My design had a total of three blocks to cut, which was going to take me some time so I set to as quickly and carefully as I could. Interestingly, two of my blocks would be for two colours each which I didn't realise would be possible.
A few hours and a pile of wood cuttings on the floor later I had three very neatly cut woodblocks – how pleasing! And it was now time to try printing from them.
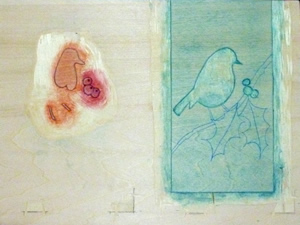
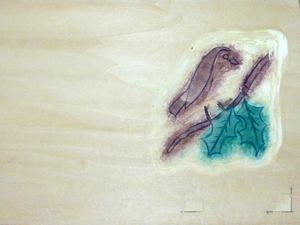
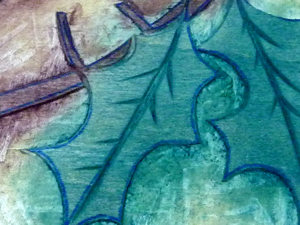
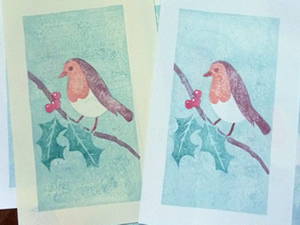
Here are pictures of my three woodblock plates with a detail picture of the holly area and two of my finished robin prints.
The printing itself is very different from my lino work. The paper and the woodblocks are kept wet throughout the process. Watercolour paint and nori - a mixture of rice flour and water are mixed together on the block with a short horse-haired brush. The paper is very cleverly registered using two little kento slots which are marks that you cut into the wood blocks to line the paper up to. A baren is used to smooth over the back of the paper to transfer the watercolour nori mix to the paper. It is quite difficult to understand what the nori is actually adding to the process, but it is obvious when not enough has been used because the print will come out uneven and textured. Laura showed us work where this uneven textured look had been used on purpose to great effect.
It was very exciting to lift up the paper after printing with all three blocks and seeing my robin design complete! I was very pleased with how my robin turned out. The beauty of the technique is that the paper can be printed and re-printed many times to build up the colour or make shaded areas, so I could continue to work on my robin prints at home and improve them further. I could even cut out a fourth block to add more detail.
I found Japanese woodblock printing a serene and peaceful process. It is a very versatile, technically simple, effective method with masses of artistic scope.
I couldn't recommend Laura’s Japanese woodblock printing day highly enough. Her teaching was clear and informative and the process itself was a joy to do. Her hubby Ben also makes very tasty soup for lunch - yummy!
Go to Laura Boswell's website
More Articles
- My Virtual Reality Gallery
- Landscape Artist of the Year
- It's nearly Autumn! Eek!
- Spring 2021
- October update
- Update for May
- Coronavirus update
- Painting Challenge results
- Autumn update
- 2019 CHALLENGE: 25 Prints and 50 Paintings
- Artweeks in Bicester begins on the 18th May!
- COMING SOON! My own Virtual Reality Gallery
- STUDIO DIARY: April 2018
- PRINTING CHALLENGE: 50 prints in 2017 part two
- PRINTING CHALLENGE: 50 prints in 2017 part one!
- I'm reviving the blog!
- BAFA Japanese woodblock printing talk and demo with Laura Boswell
- Varnishing Day 2012
- Entering the Royal Academy Summer Exhibition
- Varnishing Day at the Royal Academy of Arts 2011
- The Royal Academy Summer Exhibition letter
- Personalised cuff bracelet commission